Hello, fellow quilling enthusiasts! Today, I’m excited to introduce you the Quilled Pink Pig: A Beginner’s Tutorial.
A Beginner’s Tale
We all start somewhere when it comes to art, and my own journey with paper quilling began with curiosity and a love for crafting. As a beginner, I faced the challenges of learning new techniques, understanding proportions, and mastering the art of shaping paper strips.
The Focus on Technique
Unlike more complex quilled artworks that involve a variety of colors and intricate designs, the beauty of this simple pink pig lies in its monochromatic simplicity. By using a single shade of pink, the focus shifts entirely to technique and the fundamental principles of quilling, making it an ideal project for beginners.
Shaping and Proportion
One of the key challenges in paper quilling is mastering the art of shaping and proportion. With this tutorial, my goal was to break down these concepts into simple, easy-to-follow steps. From creating basic coils to forming tight rolls and loose coils, the tutorial covers the fundamental techniques that are essential for any quiller to grasp.
The Tutorial: A Beginner’s Guide
To share this creative journey with others, I decided to create a tutorial. This guide is designed specifically for beginners who are eager to explore the world of paper quilling. It provides step-by-step instructions, helpful tips, and detailed images to assist aspiring quillers in creating their own pink pig masterpiece.
Beyond the Pink Pig
While the pink pig tutorial serves as an excellent starting point for beginners, it’s just the beginning of a quilling adventure that can lead to more intricate and personalized creations. Once the foundational techniques are mastered, the possibilities in paper quilling become limitless.
The Free Tutorial
I believe that art should be accessible to all, which is why I’m thrilled to offer this tutorial for free. It’s my way of giving back to the quilling community and helping aspiring artists embark on their creative journeys. You can find a complete collection of my tutorials here.

INTRODUCTION
Thank you for trying out my Simple Quilled Pink Pig Pattern. The techniques required to complete your pig are all what I would consider as being suitable for beginners. If you understand the basics of quilling, you should be able to use this tutorial to create a similar pig of your own.
MATERIALS NEEDED
- Quilling Tool (slotted or needle)
- Fine-Tipped Scissors
- Fine-Tipped Tweezers
- Crafting Glue (I recommend Elmer’s)
- Standard Length and Weight Quilling strips (any brand or width should work although I suggest ¼” for extra depth and shadowing)
TECHNIQUES REQUIRED
- Large Closed Coil (multi-strip)
- Teardrop Shape
- Square/Rectangle
- Folding
- Specialty Shape (hooves)
- Spiral
BASIC STRIP SIZING
I do not generally measure my strips. Instead, I use a technique of fractions. What I mean by this is that for the major quilling suppliers that offer 17-17.5” long paper, I create my artwork using fractions of the strips.
Think of it in terms of a whole strip, ¾ strip, ½ strip, ¼ strip, and so on. I will provide the “measurements” for each piece of the pig.
THE BODY

Technique: Multi-Strip Closed Coil
- Three full-length strips
- Tear ends for feathering technique
- Allow glue to dry thoroughly
- Tack inner circle (the eye) to one side
Note: All strips used for this tutorial were standard weight, ¼” wide strips.

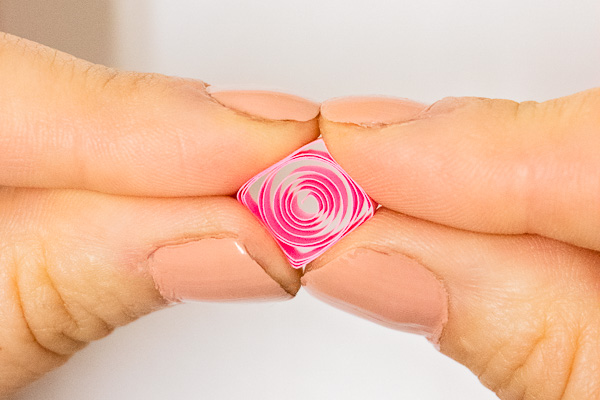
Step One
Take three full-length strips of paper. Tear the last ¼” of the ends off. You want the ends to be ragged and thin when you are done. (See image above)

Step Two
Glue all three strips together, end-to-end, and give them a couple of minutes to dry before using them.
Step Three
Use your quilling tool to create a large, loose coil. Glue the end off to close the coil.
Holding the eye gently in one hand and against one side, adjust the interior loops so they are more evenly spaced. This might take some practice and some time.
When you are satisfied, move on to the next step.

Step Four
Pinch the center open against the side with your tweezers to create an “eccentric” coil. Then put a dab of glue on it so it stays in place. If you don’t glue this, the center (which will essentially be the pig’s eye) will spring back toward the middle of the body section and will not have the correct look.
Let this dry thoroughly. And, if the glue doesn’t bond the coils and they shift, pinch it to the side and glue it again.
Don’t glue this onto anything and don’t glue anything to it until the very end.
Tip: Make sure that when you glue your finished pig to the background tha you do it glue-side down so where you tacked the eye it’s not visible.
THE EARS

TECHNIQUE: CURVED Teardrops
- One ½ length strip
- One ¼ length strip
- Make both into closed coils
- Shape the closed coils into teardrops
- Bend the pointy end of each teardrop to give it a bit of curve

Step One
Start by making two closed coils with the aforementioned strips. Remember that a closed coil is simply a loose coil that has been glued off.
Step Two
Pinch the ends of each the closed coil to transform them into tear drops. Then press your fingertip into the ends and bend them to make curved teardrops.
SNOUT and Mouth

TECHNIQUE: SQUARE/RECTANGLE
- One ¼ length strip
- Create a closed coil
- Pinch between four fingers simultaneously to form a square shape. Making two of the sides longer (rectangle) is okay, too.
TECHNIQUE: FOLDING
- One 1/8 length strip
- Fold roughly ¼” onto itself, end over end until the whole strip is folded and looks like a thick line.
STEP ONE
Create a closed coil with the ¼ length strip. Pinch it between four fingers (evenly) to create either a square or rectangle (either will work fine). This becomes the pig’s snout.
STEP TWO
Take the 1/8 strip (roughly 2” long) and fold the end to create a fold that is roughly ¼” long. Fold the folded section over onto the strip. Continue doing this until you have folded the whole thing. The goal is just to make a triple or quadruple thickness strip to use as a “line” to simulate the bottom jaw. Do not fold this as an accordion. Fold it onto itself to make nested loops.

Tail

TECHNIQUE: SPIRAL
- One 1/8 length strip (or roughly 2”)
Alternatively, a 1/8” strip will also work well for this and not have to be cut diagonally

Step One
Cut a roughly 2” long strip to use as the tail – or roughly 1/8 of a full strip.

Step Two
Starting the cut in the bottom of one corner and ending it in the top of the opposite corner, cut the strip into a long triangle. It should make a pennant shape.

Step Three
Insert the wide end of the pennant into your slotted quilling tool and twist the barrel to form it into a spiral tube. Don’t coil this in the same spot, kind of pull down on the pennant as you slowly spin your quilling tool so it stretches out.

The end result should be a short spiral pig tail. You might have to play with it a bit to get it shaped exactly how you like it.
Don’t glue this to the body until the very end.

Hooves

TECHNIQUE: MULTI-STEP SPECIALITY SHAPE
- Two ½ length strips
- First make a closed coil
- Then make a square
- Then notch one side using tweezers
- Make points on notched side
- Flatten top
- Invert curve on top
STEP ONE
Make a closed coil out of both the ½ length strips.
STEP TWO
Make squares out of both closed coils.

STEP THREE
Use tweezers to move the eye to one side

STEP FOUR
While grasping the eye that you just pulled to one side, pinch it against the other side of the square. Make sure you are pressing the back of the square against your finger or it’ll warp out of shape. Your goal is to have a sort of bunny ear effect as shown in the image above.

STEP FIVE
Once the bunny ears are formed, pinch the whole shape to create a sort of “U” shape. Notice the legs of the “U” aren’t sharp at the ends? You will fix this at the end.

STEP SIX
Flatten off the back of the “U” by pressing something hard and flat against it while holding the “legs.”

STEP SEVEN (Optional)
Push something slightly rounded into the side you just flattened to reverse the curve. This is only to help it fit against the rounded body better.

You can fix the hoof ends of the “legs” and make them more pointy by squeezing them with tweezers.

ASSEMBLY
Always dry fit your artwork before committing to a final arrangement with glue. This allows you to swap out components for ones you like better. Try out different positions. Rearrange, etc.


